|
 |
|
|
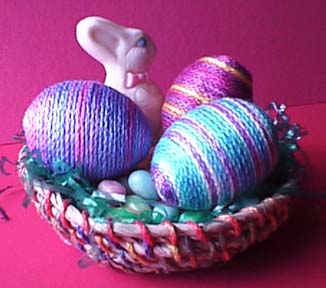
Springtime Basket filled with Mini Multicolored Eggs
by Rita Vainius
Materials:
1 Package Natural Raffia (available at most craft and hobby shops)
1 Large Eyed Needle (Tapestry Needle or Darning Needle, with eye large enough to fit 3 ply Watercolours thread through)
Scissors
Measuring Tape
3 Styrofoam eggs - approximately 2 inches long and 1 1/2 inches in diameter
Basin for hold water for soaking raffia
Paper Towels
Double-sided Tape
Faux cellophane Easter Grass (optional)
Jelly Beans (optional)
Watercolours threads - 1/2 skein Tahiti and approximately 1 yd each of Tropical Seas, Peach Melba and Sky Blue Pink (Note: any color of Watercolours can be substituted for the colors used - especially if mom has pieces left over!)Instructions:
1. Dampen the raffia in basin of warm water for about 15 minutes. Drain and remove excess moisture with paper towels. It is easier to work with slightly damp strands of raffia as they are more pliable and will then dry into coiled shape desired. If the raffia dries out as you are working, just moisten in water, remove excess and continue.
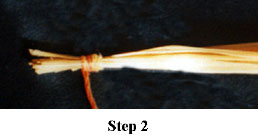
2. Lay 6 to 8 strands of raffia side by side to form a "rope" core, about I/2" in diameter. Thread your needle with a 36 inch length of Watercolors Tahiti. Wrap the thread around the bundle of raffia strands about 1 inch down from one end of strands, which are all even with each other. Wrap the thread around the raffia approximately 4 times, laying each thread next to the one wrapped before, so that the threads make a 1/2" band around the raffia bundle.
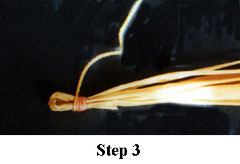
3. Bend the part you have wrapped with the thread over, to form a loop at the end, and then wrap the thread around and over both sets of strands tightly. Wrap about 4 times.
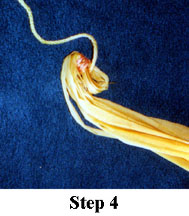
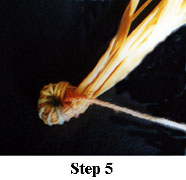
4. Insert the needle from the bottom of the loop, up through the top, passing it through the center of the loop. Starting where the raffia is wrapped with the thread, twist the loose raffia strands to make a coil.
5. Continue putting the needle through the center of the loop as you form a coil with the twisted strands around the center until one complete coil is formed. Place these first stitches close together in a circle as you attach the first coil.
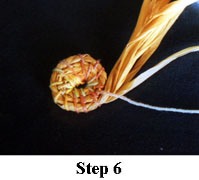
6. For the second and succeeding coils, place each stitch next to the stitch on the preceding coil to create a "wagon wheel" pattern.
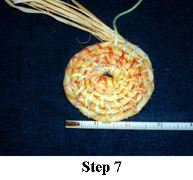
7. When the base (flat bottom part) measures about 3 inches in diameter, begin to shape the coils in an upwards direction to form the sides of the basket using the same method of stitching as for the bottom part. The technique is similar to coiling a clay "snake pot."
8. Continue on each succeeding row to shape the sides of the basket up and to lay each stitch next to the one on the coil below it.
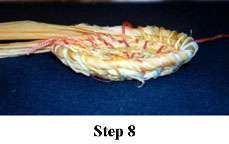
9. To add new thread, knot a new piece to the old one close to the next coil so that the knot will be hidden between the rows of coils.
Click here for Part II of this month's Kid's Project
COPYRIGHT NOTICE: No part of these instructions/project nor the included diagrams/illustrations can be reproduced or distributed in any form (including electronic) or used as a teaching tool without the prior written permission of the CARON Collection Ltd. One time reproduction privileges provided to our web site visitors for and limited to personal use only.