| Dyed and Gone to Heaven – An Online Magazine and Needlework Resource |
|
 |
Ornament Gift Tag
A Free Patttern from Lois Caron
MATERIALS
- 1 sheet 14 count plastic canvas perforated paper
- #20 tapestry needle
- 2 skeins of Snow ( a soft metallic thread form the the Caron Collection) or 1 skein Snow nd 1 skein of Watercolours
- We used Snow N01, Gold and Snow N05, Fiesta Red and Watercolours 025, Holiday. Even after we completed four ornaments, we had plenty of thread left to do more.
CLICK HERE FOR CHART
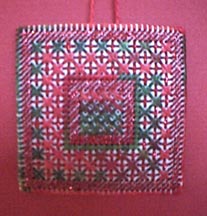
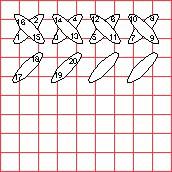
1. With your first color, stitch 16 cross stitches in the center of your design.
Each line on the grid is equal to one plastic canvas thread.
2. With the second color, stitch a border of diagonal satin stitches over two canvas threads all around
the crosstitch center. You will need to adjust the stitches on opposite corners.
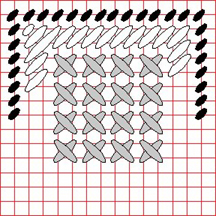
3. With either the first or second color, stitch a row of continental stitches over one thread all around
(stitches are shown in black).Work from right to left and top to bottom just as you did with the satin
stitches.
4. With the first color, work three rows of cross stitches over two threads all around the design.
Leave two canvas threads betweeen each cross stitch. In the second row, the cross stitches should be placed over the blank spaces in the previous row.
It is easiest to see the proper placement of the cross stitches if you work the rows in squares, following the stitching you've alrady done.
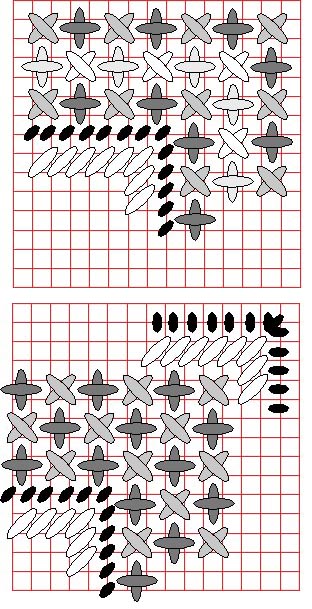
5. With the second color, fill in the blank spaces with upright cross stitches. Be sure the top stitches always face in the same direction.
6. With the second color, stitch another row of diagonal satin stitches all around the design.
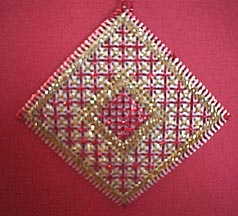
7. Cut all around the ornament, leaving one row of blank plastic canvas on all four sides.
8. Work one vertical stitch in each hole around the edges, except for the corners, where you should work three stitches.
1. Using some of the leftover thread, attach a hangar from one corner or from the center of one side.
2. If desired, add beads or tassels on the bottom tip or edge.
3. You may cut out a piece of felt or construction paper the same size of the ornament and glue it to the back. If you're giving it as a gift, you may wish to sign and date it.
OTHER IDEAS
1. Use the ornament as a gift tag. The recipient can then use it as a tree ornament, also.
2. Use the design as a box insert.
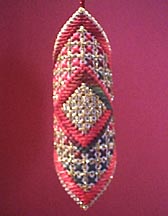
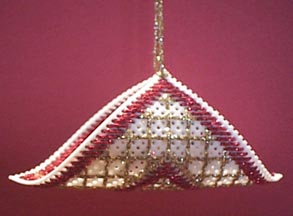
3. Tack two opposite corners of the ornament together with a few hidden stitches. Depending on where you place the hangar, you can end up with two different shapes (See pictures of finished designs).- .
- .
1999 The Caron Collection / Voice: (203) 381-9999, Fax: 203 381-9003
CARON email: [email protected]