| Dyed and Gone to Heaven – An Online Magazine and Needlework Resource |
|
 |
"A Very Crewel Bookmark!"
Designed by Ellen Moore Johnson and Rebekah Johnson
Materials
Caron Impressions - #3041 Red
#28 tapestry needle
Two 10" x 12" pieces of ivory colored wool fabric
Removable tape
Iron and ironing board
Tape measure
Straight pins
Fine line water soluble marking pen
3" x 6" oval embroidery hoop
Embroidery scissors
Ivory sewing thread
Sewing machineInstructions
Please read all instructions before beginning.
1. Print out a copy of the pattern and instructions. It is very important for you to ask an adult for help with steps 6, 7, 8, & 9. These steps are part of constructing the bookmark and require the use of a sewing machine and iron.
2. Secure the pattern to a hard surface with removable tape. (A light colored counter top or sunny window works very well.) Place one of the pieces of wool fabric on top of the pattern and adjust it so that the grain of the fabric is aligned with the grain line on the pattern. (The other piece of wool fabric will be used when constructing the bookmark.)
3. Secure the fabric to the hard surface with removable tape.
4. Trace the bookmark pattern and embroidery design onto the fabric with a fine line water soluble marking pen. Make sure that all of the pattern lines are transferred, including the cutting and sewing lines. This piece will be the front of the bookmark.
5. Remove the fabric from the tracing surface and work the embroidery according to the instructions supplied. Refer to the stitch diagram and color picture of the project as necessary. Happy Stitching!Constructing the Bookmark
1. Place the second piece of wool fabric on top of the pattern and adjust it so that the grain of the fabric is aligned with the grain line on the pattern.
2. Secure the fabric to the hard surface with removable tape.
3. Trace the cutting and sewing lines of the bookmark pattern onto the fabric with a fine line water soluble marking pen. This piece will be the back of the bookmark.
4. Cut the front and the back pieces of the bookmark out along the designated cutting lines.
5. Place the front and back pieces right sides together. Align the edges and pin the pieces together with straight pins.
6. Machine stitch around the two long sides and one short side using a 1/2" seam allowance. Trim the seam down to 1/4" and zigzag stitch the raw edges to prevent fraying. Turn the bookmark so that the embroidery is on the outside.
***Traces of the (blue) water soluble marking pen should now be removed by moistening one end of a Q-tip swab with cool water; very lightly and carefully dab (only) the affected areas with the damp Q-tip. Take special care to avoid touching the thread with the moist Q-tip. (Squeeze the excess water from the Q-tip to prevent the dye in the thread from bleeding onto the fabric.)
7. Place the bookmark, embroidered side down, on a thick terry towel. Set the iron to medium heat and carefully press the seams.
8. Turn the unstitched bottom edges to the inside 1/2" and slip stitch the opening.
9. Carefully press the bottom edge with an iron set on medium heat.10.Whip stitch around the edges of the bookmark with one strand of Impressions threaded in a #28 tapestry needle for a nice finishing touch.
11. Mark your place in the book you are reading with the new bookmark you just made and pat yourself on the back for a job well done!
Click here for CHARTS
Working the Embroidery
Crewel embroidery is the technique that is used to complete this fun project. Work all of the embroidery with one strand of Impressions threaded in a #28 tapestry needle.* Special note to stitchers: Ellen's website contains a resource page,The Embroiderer's Workbook, which uses photographic illustrations that demonstrate how to do certain embroidery stitches. To access that information go to :
http://www.heirloomembroidery.com/workbook.html
Begin by stitching the outlines of all three butterflies' wings in stem stitch. Next, work the butterflies' bodies in backstitch. Use a French knot on a stalk (also known as pistil stitch) to form the butterflies' antennae. Work the heart shapes in stem stitch.
Complete each butterfly by adding the wing details as follows:
Butterfly #1: Use the seed stitch to fill in the outer edge of each wing. The heart shapes are worked in satin stitch. Each circle is filled with four French knots.
Butterfly #2: Work a French knot on each dot in the outer edge of each wing. This butterfly's body is filled with seed stitch. Each circle is filled with 4 French knots. The oval shapes are worked in granitos. The heart shapes are worked in satin stitch.
Butterfly #3: Completely fill the outer edge of each wing with French knots. Each circle is filled with four French knots. The heart shapes are worked in satin stitch.
NOTE: Use a waste knot when beginning the embroidery. You do this by making a knot in the thread. Then go down into the fabric at least two inches away from the starting point; bring the needle up at the starting point and begin stitching. Upon completing the stitching with that thread, cut the waste knot off and pull the thread through to the back of the fabric. Thread the short "tail" into the needle and secure to the back of the embroidery using three or four small loop knots.
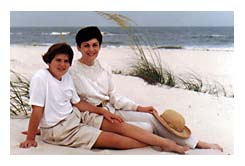
About Rebekah and Ellen
Rebekah is 12 years old and is in 6th grade. She has been an avid needlepointer for about a year and is beginning to learn embroidery. She has grown up amidst needles and threads and fabrics (because Ellen, her mother, is addicted to needlework). She is currently working on a needlepoint pansy canvas. Rebekah received a birthday present, gift-wrapped in a paper decorated with butterflies. It was her idea to use butterflies as the motif for the project. She also consulted with Ellen on stitches to use and suggested that the finished piece be a bookmark.
Ellen Johnson has specifically created this "Crewel (Not Cruel!) Kids' Project" for Caron Website visitors in the hopes that it will introduce some young stitchers to the wonderful joys of doing crewelwork. Kids can change and add colors and additional stitches to suit their own fancy once they have gotten some practice with it. Ellen had several reasons for choosing only red thread for this project, "I thought it would be quite fitting since February brings Valentine's Day. My second reason... is that redwork embroidery has been featured recently in several trade and consumer publications. Many of the stitches are the same for redwork embroidery, crewel embroidery and surface embroidery...Redwork has a reputation for being simple because it looks simple - only red thread is used and the stitches are very basic. I hope, by using the red wool thread, to entice beginners to try their hand at my project and to see for themselves that all embroidery is really simple."
Ellen Johnson works as a freelance designer, teacher and author. Her project-based articles have appeared in publications including Decorating Digest Craft and Home Projects, Creative Needle, Fancywork and Handcraft Illustrated. She stresses: "Beginners will find that the stitches I use are quite simple when the appropriate tools are used...The combination of simple stitches into intricate patterns makes the work look difficult, but it is very easy to do."
Note: For an adult or experienced young stitcher's class for one of Ellen's Heirloom Embroidery Designs see her Online Class for a Holiday Sachet Pouch in our Online Class archives at
http://www.caron-net.com/dec99files/dec99cla.htmlFor more information contact Ellen Moore Johnson at:
Fine Designs for Heirloom Treasures
3806 Somerset Place
Tuscaloosa, AL 35405
Phone: (205) 556- 9222
Fax: (205) 556 - 4761
E mail: [email protected]
Website: http://www.heirloomembroidery.comCOPYRIGHT NOTICE: No part of these instructions/project nor the included diagrams/illustrations can be reproduced or distributed in any form (including electronic) or used as a teaching tool without the prior written permission of the CARON Collection Ltd. One time reproduction privileges provided to our web site visitors for and limited to personal use only.