Back to Kid's Corner Main Page
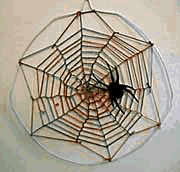
Decorate a window or wall with
our fancy spider web and see what ghost and goblins you attract this spooky
Halloween.
WHAT MATERIALS YOU'LL NEED:
1 skein of the CARON Collection's
Watercolour thread (or similar thread)
1 thin wire clothes hanger (the kind
you get form the dry cleaners)
scissors and a marker
a piece of cardboard approximately
1" x 2"
INSTRUCTIONS
STEP 1: Remove the label from the skein of thread and untie the
knot at the end of the skein.
STEP 2: Untwist
the skein and open it up so it is one large loop and you can separate the
threads. Cut a piece of the thread to start with that is about 4 feet long.
STEP 3: Take
wire hanger and shape the bottom triangular portion into a circle.
STEP 4: With
the magic marker, make a mark on the hanger at the bottom opposite the
hooked part used for hanging. Then divide each half of the circle into
3 approximately equal sections. You should have six equal sections marked.
STEP 5: Using
the 4 foot piece of thread you just cut and starting at the top under the
hooked hanging part (starting at the right side), attach a thread to the
wire hanger with a double knot, moving to the left attach the thread with
a double knot to the left side as well. (the knots will be only about 1/2"
apart.)
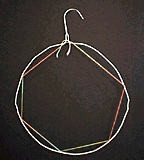 |
STEP 5: Then
still moving left take the same thread and make a knot at the first mark
on your hanger. Continue around the circle making a knot at each mark around
the circle until you reach the top starting point. Keep your thread fairly
taut as you work your way around the circle. Make a double knot a the top
to secure the thread and cut off any extra. Your hanger should be stretched
with six segments of thread like the example on the left. (All knots can
be trimmed neatly later.) |
|
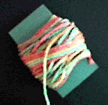
STEP 6: Take
the remaining thread (left over from the skein) and wrap it around the 1"
x 2" cardboard to make it easier to work with. (Start by wrapping only
10 to 15 feet of the thread so it is more manageable.) |
|
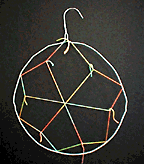
STEP 7: Cut
a new piece of thread about 1 foot long and attach it with a knot to the
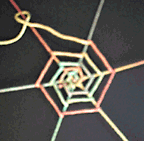
middle section of the top left thread. Stretch it diagonally to the opposite
side and knot it in the center of that thread too. Repeat the same process
2 more times attaching a thread in the middle of each segment and stretching
it diagonally to the opposite side until you have the center crisscrossed
with threads as shown on the left. (Trim thread ends as needed.)
Next cut another 1 foot long piece of thread and knot it at the base
of the hooked hanger and stretch it diagonally to the opposite side knotting
it around the hanger and thread. Repeat the same process at the two other
points where the thread was attached to the hanger each time stretching
the thread diagonally and knotting it at the opposite side. You'll end up
with a total of 12 threads coming out of the center. |
|
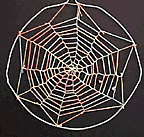
STEP 8: Using
the thread you wrapped around the cardboard and starting in the middle of
the circle (where all the threads crisscross) secure your new thread with
a double knot to keep all the threads in the center together. When this
is secured take your thread and weave it in a circle, going from left to
right, making a left to right knot on each thread as you come to it. Keep
your thread fairly taut as you do this. Keep following this same procedure
as you make ever widening rotations around the circle. Leave approximately
1/2" to 3/4" between each successive row of circles that you are
creating. Do this for as many rotations as it takes to reach the outer edge
of the circle. This should give you 8 to 12 rows depending on how far apart
each rotation is. If you run out of thread while you are doing this, start
with a new batch of thread and simply knot the old and new thread together. |
|
STEP 9: When
you get to your starting point (at the top) on your last rotation secure
your thread with a double knot below the hook of the hanger. Make sure all
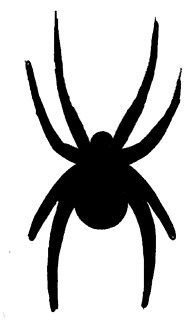
the knots you've made are secure and trim them as close as possible. Print
out the spider below (glue it to some heavier paper if you wish) cut it
out and tape or attach to your web. Now you have a magical spider web and have to wait and
see what prey it will attract this spooky Halloween! |
Note: A cotton thread equivalent
may be substituted for Watercolours thread but the effect will not be the
same as with the variegated thread shown.
COPYRIGHT NOTICE: No part of these instructions/project nor the included diagrams/illustrations
can be reproduced or distributed in any form (including electronic) or
used as a teaching tool without the prior written permission of the CARON
Collection Ltd. One time reproduction privileges provided to our web site
visitors for and limited to personal use only. |
