
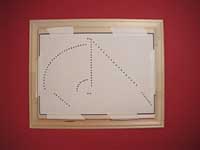
Materials you will need:
A
piece of wood 7" x 8 1/2 " or larger and minimum of 1/2"
thick
(we used a ready made piece of beechwood 8
1/2" x 10 1/2" (1" thick) with beveled edges purchased at
a craft store)
CARON Watercolours thread (or comparable weight threads)
- Spinaker Sail - Tahiti #CSO86311
- Main Sail - Dawn # CS134223
(untie each of the
thread bundles to separate the threads)
- Mast and Body of the Boat - Blueberry #CSO41318
Nails we used brass hobby nails (pins) size 16 x 3/4"
Masking or other tape
Instructions:
Step 1- Print out the nail pattern guide
below.
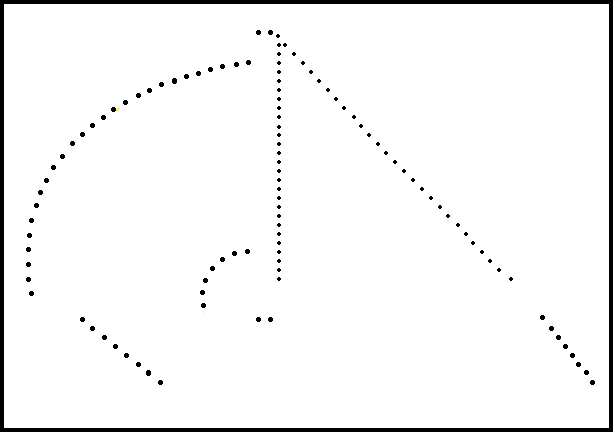
Step 2 - and securely tape it on to your piece of wood.
Make sure to tape it on all four sides so it stays put while you nail in
the pins.
Step 3 - place a nail on any dot on the pattern guide
and nail the nail in half way so at least 1/4" to 3/8" of the
nail remains above the paper. (You need to have enough room to wrap the
thread around each nail.) Nail in a nail in each of the dots on the pattern
guide until you have filled the entire sailboat shape.
Step 4 - Carefully tear away the paper so only the nails remain on the wood.
Use the numbered guide below
for how to string the thread.
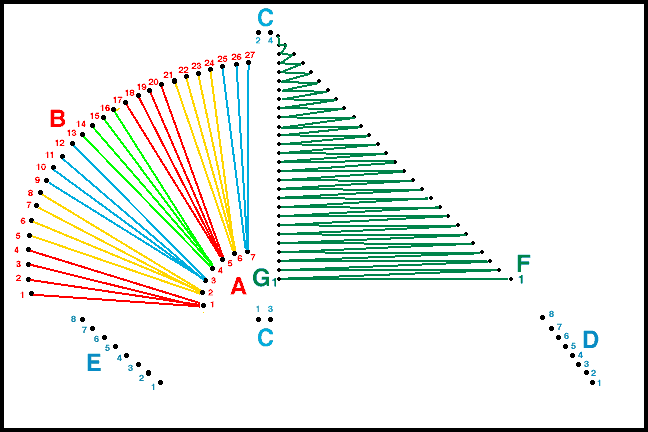
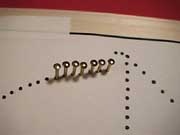
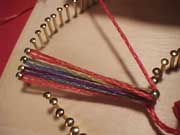
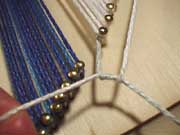
Step 5 - First we'll start with the multi-colored Spinaker Sail. Starting with the Tahiti Watercolours thread at point
A-1 tie the thread to the nail using a double knot, but don't cut off
the excess yet.
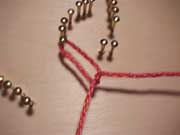
Step 6 - Holding the thread taut bring it to nail B-1
and wrap it around the nail once. Bring it back to nail A-1 with a single
wrap around the nail and proceed to nail B-2, where you will repeat the
above process, continue wrapping nail B-3 and B-4 the same way. After you
wrap B-4 thread around A-1 continue wrapping the thread to B-5. (There
are 4 B wraps for every A wrap as shown in the diagram.)The proceed
to wrap B-5's strand to A-2 and continue with B-6, B-7, and B-8 the same
way. Continue wrapping around A and B nails until you reach the top. The
last nail A-7 will only have threee wraps on it. Once you have wrapped
the last thread from B-27 to A-7 tie a knot around A-7 to secure the thread.
Closely cut off the excess thread on both A-1 and A-7 nails.
  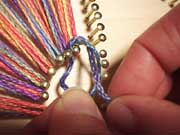
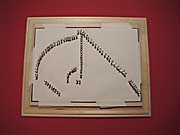
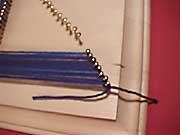
Step 7 - Next
we'll do the Mast. Tie the Blueberry Watercolours
thread to Nail C-1 with a double knot, but don't cut off the excess, yet.
Wrap the thread to nail C-2 and back to nail C-1 then up to C-3 and back
to C-4. tie a knot around nail C-4. Then tie the strand from C-1 together
with the C-4 strand inot a double knot and cut off the excess.
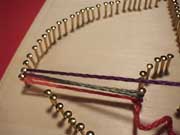
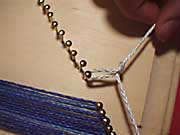
Step 8 - Now the Sailboat body. Using the Blueberry
Watercolours thread tie a knot to nail D-1. Then wrap that thread around
E-1. Proceed wrapping D-2 to E-2 and so on until the whole body of the
boat is filled in. After you have wrapped thre thread around D-8 take the
thread to E-8 again and wrap around it, proceed to E-1 and then back to
D-1 where you will tie the thread together with the remaining thread on
D-1. Tie a double knot and cut off the excess.
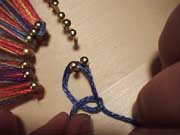
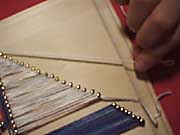
Step 9 - Lastly the Main Sail. Using Dawn Watercolours
thread and starting with nail F-1 tie a knot then proceeding to the left
to G-1 and then back and forth to row F and G until you reach the top as
shown in the diagram After you reach the very top, wrap the thread around
it and then bring it back down to F-1 and tie it together in a double knot
with the remaining strand. Trim the excess thread close to the nail.
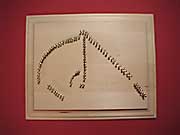
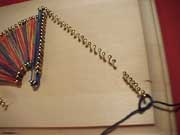
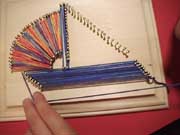
Step back and admire your handiwork.
Your ship is ready to set sail.
COPYRIGHT NOTICE: No part of these instructions/project nor the included diagrams/illustrations
can be reproduced or distributed in any form (including electronic) or
used as a teaching tool without the prior written permission of the CARON
Collection Ltd. One time reproduction privileges provided to our web site
visitors for and limited to personal use only.
|
