If you started with a piece of Ivory Janina 14" x 14",
you can continue with the 1st color way from April's Online Class
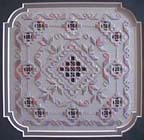
to expand the pattern as shown in the framed Hardanger embroidery.
Or you can make a new embroidery in the second color variation,
as pictured in the frame, by following the instructions from
Part I, using the materials below, and continuing through Part
II.
Note: For stitch diagrams for Part II of Horizons, refer
back to Part I of this class from April website.
Design size: 7 1/4" square on 22 count Powder Blue
Janina by Zweigart
Materials needed for framed design:
14" x 14" Powder Blue Janina by Zweigart, 22 count
1 skein each Caron Watercolours and Wildflowers, color 011 -
Pebbles
1 Tapestry Needle size 24
Sharp, fine pointed embroidery scissors
*The star diagrams illustrated are a little smaller than the
one in this design. Watch the chart in the pattern closely for
the number of stitches and length of each stitch for the stars
and the solid motif that borders the design. You will learn the
technique by following these stitch instructions. It may be a
good idea to try the star stitch on another piece of fabric before
attempting the one in this design, just to get comfortable and
familiar with the technique
*Star: The star motif is a variation of the basic satin
stitch. Each petal is worked separately and from the center to
the outside. Find the center hole of the area where the star
is to be placed and count up two holes. Bring the Watercolours
thread up in the hole and make the first satin stitch which covers
two threads of the fabric (16a). Continue the satin stitches,
increasing on the right side by one thread with each stitch (16b).
The fifth stitch should cover six threads of fabric. With the
next stitch, begin decreasing on the left side (16c), remaining
in the same row as the previous stitch on the right side. Continue
until the ninth stitch covers two threads of fabric. Slide the
needle under the completed petal on the wrong side of the fabric
and continue with the remaining petals (16d). Notice the stitches
for one petal share the holes with the adjoining petal. This
basic motif can be expanded by increasing each petal to the desired
size. Notice the completed star will have an unworked area in
the center which is four threads square in size.
*Use one strand of Wildflowers for the diagonal and straight
cable stitches.
*Cable Stitch: (also known as faggot stitch). The cable
stitch is worked in Wildflowers thread. Begin by securing the
thread on the back and bring it up in the hole designated on
the pattern. Count up two holes and over two holes from where
the thread emerges and insert the needle. Bring the needle out
as shown (10a). Again, count up two holes and over two holes;
insert the needle and bring it out where the previous stitch
ended (10b). Continue in this manner, always counting from where
the thread emerges and always bringing the needle up in the hole
where the previous stitch ended (10c, 10d). To turn a corner,
pivot the needle in the corner hole and bring it up as shown
(10e). Return to the corner hole and proceed as before (10f,
10g, 10h).
*Cutting: When cutting in the outer row, cut only the
four center fabric threads on all four side of each square. This
will leave four bars in each section to be woven.
*Use one strand of Wildflowers for weaving and webs. For the
outer row, weave three and one half bars and insert the web before
weaving the last half of the fourth bar. In the center design,
weave the bars in a stair-step pattern, inserting webs as you
get half way through the fourth bar that completes the square
where a web is inserted.
*Weaving: After completing the cutting, there will be
a network of threads left, all in groups of four. These will
be wrapped or woven into bars with the Wildflowers thread. Secure
the end of the threads into the satin stitches on the back of
the fabric and bring the needle to the right side of the fabric
through the middle of the four threads. Bring the needle around
the threads on one side and then back to the middle (3a). Repeat
on the opposite side (3b). Continue weaving in a figure- eight
pattern until the entire bar is filled. It is extremely important
that the weaving be very tight and even; therefore, pull each
stitch firmly before continuing. When one bar is complete, cross
over to the next bar by bringing the needle from the far side
of the completed bar up into the center of the next bar (3c).
This will leave a small crossover thread on the back of the work.
*Webs: These lacy fillers go quickly and add much to any
piece of Hardanger embroidery. Weave 3 bars. To insert a web,
bring the needle up through the center of the adjacent woven
bar (4a). Bring needle under the first side of the web and then
up through the center of the next woven bar (4b). Proceed to
the third bar and repeat 4b. Pass needle under the third side
of web and pull needle through to create the twist. Complete
the web by bringing the needle over the first side of the web
and up through the center of the unfinished bar (4c). Finish
by weaving the last half bar.
*When completed, press your design face down on a terry cloth
towel being careful not to crush your stitches. It is now ready
to be framed. (Or made into a pillow, if you prefer.)
General instructions are taken from Beginner's Charted
Hardanger Embroidery, copyright 1980, by Susan L. Meier and
Rosalyn K. Watnemo.
Rosalyn Watnemo's designs are available from Nordic Needle
at:
1314 Gateway Drive, Fargo, ND 58103
Phone: (701) 235-5231 and (800) 433-4321
Fax: (701) 235-0952
E mail: needle@corpcomm.net
Website: http://www.nordicneedle.com

 Click on the picture for
a larger sample
Click on the picture for
a larger sample