Materials Needed:
3 pipe cleaners ( we used red, but orange or brown would work nicely too.)
Thin cardboard at least 6"x 6"
1-2 skeins Watercolours. Choose any of the variegated threads in browns,
oranges or reds of your choice. (How full you make the pom-pom center will
determine how much thread you need to use)
Compass, Ruler, Scissor, Paper Glue, Stapler
1 Moderately sharp needle and one blunt yarn needle
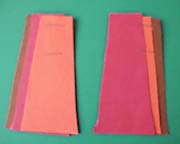
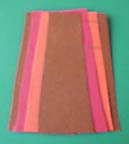
Heavyweight construction paper (we used two sheets of red, 1 of brown and
one of orange)
Mat knife or Exacto knife
Instructions:
Step 1 - Using the compass on the cardboard draw 2 circles: 3 1/2" wide with
another circle in the center 1" in diameter. Or use our circle guide
below.
Step 2 - Cut out these circles using a scissor, mat knife or exacto knife. And
cut out the center circle so it looks like a donut. (An exacto knife works
best for cutting out the center circle)
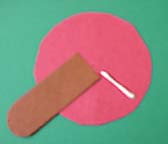
Step 3 - Thread approximately 50" of the Watercolours thread into blunt needle.
(If you double up the strands of thread, this part will take less time).
Step 4 - Use the intructions below
for making the pomp-pom body of the tukey. You will be using variegated
thread but otherwise the intructions are the same. Put the 2 circles face
to face and bring thread through center and around the edge and then back
through the center, moving around the disk and covering the cardboard disc
as you go around. Make about 3 or more layers around the disc. Use as much
thread as you need to cover the cardboard. The more layers you do the fuller
the pom-pom will be. When you are done, you should have almost no opening
in the center.
-
-
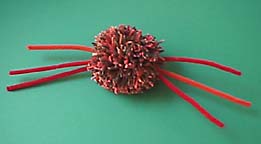
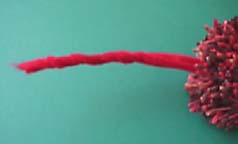
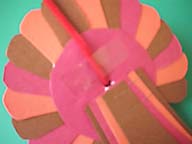
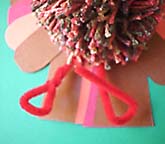
Step 5 -
Insert the 3 pipe cleaners through the opening in the center of the uncut
pom-pom. Pull them half way through. (Note : The picture shows only
one pipe cleaner you are using three.)
-
Step 6 -
Slip a sharp scissors point between the 2 cardboard discs and cut the threads
all around the edge of the circles. Wind and tie with a separate thread
between the 2 discs. Pull this tight before tying the knot. Then pull the
discs off over the thread ends or cut the cardboard on one side to remove.
-
-
Step 7 -
Fluff the pom-pom making a puffy ball shape. This is the turkey's body
and the pipe cleaners will make the beak and head on one end. The three
on the other end will be used for feet and to attach to the paper feathers.
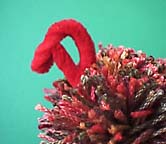
Step 8 -
Twist the three pipe cleaners on one end together and then bend them into
a beak shape as shown below. Tuck the ends into the pom pom.
 ---- ----
Step 9 -
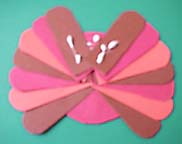
Next cut out the construction paper pieces. Use the circle guide and cut
out (3) 3 1/2" circles. Make sure you make the center like we did.
(We used red construction paper.) Using the guide below cut out the feathers,
first 17 TOP FEATHERS. (We used 7 brown, 6 orange and 4 red, but you can
use any colors you wish.) and lastly cut out the TAIL FEATHERS. (We used
3 brown, 2 orange and 2 red.)
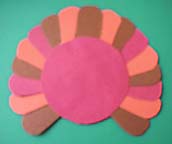
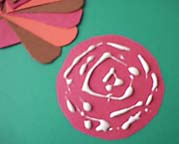
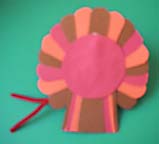
Step 10 -
Now you'll assemble the top feathers. Place one of the circles down on
a flat surface. Put a a strip of glue from the center to the edge as shown
below and then taking one of the top feathers lay them on the circle being
careful to not cover up the center mark. In a clockwise motion proceed
gluing and pasting feathers overlapping as shown around the circle until
you've gone up one side with 7 feathers. Repeat on the next side. Lay the
last three feathers and fill in the top of the circle so that you've now
covered 3/4's of the circle. Glue the entire back of the second red circle
and paste it on top of the feathers lining it up with the bottom circle.
 -- -- -- --
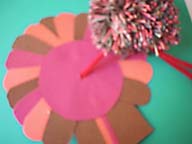
Step 11 -
Next you'll take the top feather assembly and pass ONE of the pipe
cleaners, from the opposite side of the pom pom, through the center of
the circle until the pom pom is snug against the circle. Turn the circle
over and tape the pipe cleaner to the circle using two or more pieces of
tape.
Step 12 -
Now the tail feathers. Take one of each color of the tail feathers and
overlap them about 1/4 inch making sure they are flush at the bottom edge
(the wider edge). Staple them together with two staples about 1/2"
and 1" from the top edge. Repeat with the other 3 tail feathers. (You
will still have one left over.) Overlap the two sides, and glue them and
then place the last feather in the middle as shown below.
 --- ---
Step 13 -
Now you'll put together the top feather assembly and the tail feather assembly.
Glue, then place the tail feather assembly over the back side of the circle
under the center hole. Secure it in place and then cut off the excess pipe
cleaner. Glue the back of the remaining red circle and then place it on
top of the tail and feather assembly you just put together. The back of
the Turkey Desk Topper should is now complete.
 -- -- -- --
Step 14 -
Turn the turkey over and bend the two remaining pipe cleaners down to make
the two feet. Bend the pipe cleaners into small triangles and twist the
ends around the ankles. Bend the feet above the triangles and stand your
turkey up adjusting the feet so that the turkey balances on its feet and
tail.
Now step back and admire your handiwork!
COPYRIGHT NOTICE: No part of these instructions/project nor the included diagrams/illustrations
can be reproduced or distributed in any form (including electronic) or
used as a teaching tool without the prior written permission of the CARON
Collection Ltd. One time reproduction privileges provided to our web site
visitors for and limited to personal use only. |
